Hello and welcome to my blog where I have created a simple tutorial to show just how easy it
is to create a beautiful life-like baby doll using the Special Care Air Dry Paints.
The Special Care Nursery paints were designed with the beginning artist in mind.
The "Beginner Set" has all of the pigments, mediums and thinners added in.
One just simply stirs then well, pours them from the jars and goes to work!
It was hard for me to stay within the boundaries of how a new artist would work, and not bust out with all of my Master Artist techniques during this painting session! I will be very anxious to use these paints within the Master Artist realm in the future but for now, I am DELIGHTED with how
beautiful these paints are and how this Simple Treasures Series baby came to life.
He truly is very real looking.
So, let's get started!
Supplies:
- One "Beginner" set of Special Care paints
- Special Care Gloss and/or Satin Varnish for lips and nails
- If you are making the move from Genesis paints to air dry, you will need a new set of brushes and sponges for acrylic paints. Never use brushes used on oil paints with air dry paints.
- Small saucer plate or palette with a well/dip in the center
- Flower palette or a small dish or two
- I highly recommend that a vinyl or plastic glove be worn on the hand that handles the vinyl parts, no matter what paint you use to paint your doll with. You see, oils from your hands can stick to the vinyl creating many problems for you as you paint~the number on being that the paint won't stick.
- A new doll kit that has been washed in hot water with dawn dish soap and rinsed well
I was asked to test these paints, so I decided to reborn my first "Soft Line" vinyl sculpt from
Doll Dreams. I've never worked on one of these and thought this would be an exciting journey.
(By the way, I LOVED working on this vinyl and the paint took right to it. I did not coat this kit with any sealers or varnish before I began, or after I was finished.)
The kit I selected was Joshua by Reva Schick.
The vinyl is really quite creamy already but I desired to use either the Blue Wash or the Mint Wash just so I could test these washes out.
I felt the color was closest to the "pink" tone, and even though I did not show the color on the other side of the color wheel that would neutralize it, the neutralizing color would need to be the Mint Wash.
(CLICK ANY OF THESE PICTURES TO VIEW FULL SIZE)
~The coordinating text for each picture is ABOVE each picture~
Stir the bottle of Mint Wash (or Blue Wash should your kit need blue) using a thin wooden skewer or a small paint brush. Pour it directly onto your small saucer or palette.
Swish some of the color up onto the side of the palette and dip a just damp sponge into it.
(You will see a sample of this in another part of the tutorial.)
Soak a clean wedge in water and squeeze out the excess. This is a handy thing to have on hand for beginners in the event that you need to quickly remove paint before it dries.
The process for application of air dry paints is typically the same on all layers:
Apply paint with a damp (with water) brush or damp (with water) sponge/wedge and finish up with a dry wedge and/or dry mop brush.
Rinse brushes and sponges out frequently, blot drying on clean paper towels.
Change your wedges often.
Sporadically apply the Mint Wash (or Blue Wash) to a section of your kit,
starting at the back of the head.
Just one pounce of the damp, paint-loaded sponge is all you need to do. If you keep applying it over and over again you won't have any texture to your doll in the end. Leave open spaces for the natural vinyl to come through, unless your kit is a horrible orange, brown or pink color. In that case, coat all of the vinyl, but in small sections.
Immediately pounce the wet paint with a dry wedge until the paint is just dry.
Continue onto the top of the head, around the ears and onto the face, working in small sections. Rinse your sponge as needed and change wedges often.
As a side note, this type of sponge does not do well to be re-used, except for the current color you are working on. Once you are done with that color completely, it is best to throw this type of sponge away as the texture seems to be jeopardized over time.
Use a dry mop brush to pounce the paint in areas where the wedge does not fit.
I keep 4 of these mop brushes on hand for one painting session, rinsing them and allowing them to dry when I feel paint is building up on them.
I always have a dry one available to use this way.
I have finished applying the Mint Wash to the head. Here you can see the comparison of the coated head and uncoated leg.
At this point, it is typical of me to set the Mint Wash aside and begin the lips.
Stir the Lip and Nail color well and place a small amount into your flower palette or small dish.
Using a damp filbert brush, apply the color to the lips avoiding the center of the top lip
on the first pass through. Blend and refine the paint by blotting your application brush on paper towels, using the dry brush to follow up your work, then blot any excess paint with a dry wedge.
On the second layer, (which can be applied right away)
lightly coat the center then immediately use a wedge to soften the color until is almost isn't there.
Add color as desired, making some areas lighter and some darker.
I then set the head aside and begin applying the Mint Wash to the limbs, starting with a leg.
I always work from the bottom of the foot/palm of the hand up towards the flange of the limb.
The techinque is the same for either leg or arm so I only show the work on a leg.
Once I have applied the Mint Wash to the foot using the same procedure as the head, I set it aside and I start work on the nails.
I have always preferred to use a purple color on my nails so I will use the Eyelid Purple on these nails. Feel free to use the Lip and Nail color on your doll if you desire.
Place a small amount into your flower palette or small dish.
Apply a wet layer of the color to the nails,
then quickly blot dry your brush on paper towels and go over the nails removing excess paint with the dry brush.
Use a wooden pick to remove paint from the creases and use a damp wedge to remove paint from the front of the toes and fingers.
Set the Eyelid Purple color aside and continue applying the Mint Wash to the leg/arm.
Repeat this process until each limb has had the Mint Wash applied and the nails coated.
Once the limbs are complete with those two steps, I go back to the Eyelid Purple color and
apply it to the upper eye lid.
Very quickly pounce with a dry wedge.
Continue with the other lid.
I also use Eyelid Purple on the lips!
Just one layer of Eyelid Purple adds much to the lips.
At this point, I am finished with the Eyelid Purple and the Mint Wash.
Clean off the plate and palette, saving any excess paint in a clean, airtight container.
Do not put your paints back into the original bottle as they have changed in consistency and we don't want to compromise the perfect mixture that is in the bottle.
When you go to use the self-stored paint for a future project and it does not "behave" well for you, simply toss it out and start with fresh paint.
The next layer is the Dark Pigment Wash.
Pour some of the paint onto your saucer/palette.
I apply it with a damp, large pore sponge as seen in the picture.
This is a sponge that was located at an Equine supply store and is a
horse bathing sponge! I just just a small section from the large sponge.
As you can see from the pink color on this sponge, this sponge does very well to be used over and over and over again. Rinse well during use and after each completed step.
Apply this color sporadically, in small sections just like you did the Mint (or Blue) Wash.
This sponge has lager spores and creates more defined texture as you work.
Once the head is completed, begin work on the limbs starting at the bottom of the foot/palm of the hand until all pieces are coated.
Remember to rinse your sponge often and change wedges often.
You are now finished with the Dark Pigment Wash and can clean off your saucer.
Next you will be shading the creases and folds of you kit.
I like to use a Round #5 brush for creases, sometimes selecting a smaller round brush for very small creases.
As always, use a damp brush and rinse often.
Work on only one or two creases at a time so that the paint does not begin to dry.
Smooth out the paint and remove excess with dry wedge and/or dry mop brush.
Continue in all creases of the head, including the back of the head in neck creases, the ears
and the nostrils.
I like to apply a little bit of the crease color to the creases of the lips.
Set the head aside and begin work on the bottom of the feet/hand working up to the top of the leg/arm.
Use a smaller brush if needed on the creases across the tops of the toes and fingers.
Repeat the process until all of the limbs are complete with creases.
At this point, because I had taken time to take photos of the process while I painted, I am finished for the first day.
I probably would have gotten the next step finished in this day while I had good light.
I tell you this so that you can gauge what amount of time it will take you to paint your baby doll, so as not to discourage you that it is taking so long.
My husband always says, "you can't rush art". Indeed.
The next step is a unique step that I created many years ago that I call the "Newborn Flush".
I guess you could say this step replaces the Berry Maker for which I never did succeed with.
I will use the Pale Mottling/Blush for this step and will explain it in greater detail than the other steps because it has been my experience that this is the area that many new artists struggle.
This layer will add a great amount of detail and visual texture to you doll when done correctly.
The keys to success on this layer are:
Have a very small amount of paint on your large pore sponge.
Keep the application of the paint very sparse and well spaced.
Follow up immediately with a dry wedge.
Lets get started!
Using a brush or a craft stick, swoosh a small amount of paint up onto the side of your
saucer/plate/palette.
Allow much of the paint to flow back into the well in the center.
You want a VERY thin layer of paint left on the plate.
With your sponge just damp, dip it onto this thin layer of paint.
Pounce the painted sponge onto a clean paper towel.
Apply the paint sporadically starting at the back of the head and in small sections.
Space the application out so that the color will not run together making an opaque and flat tone.
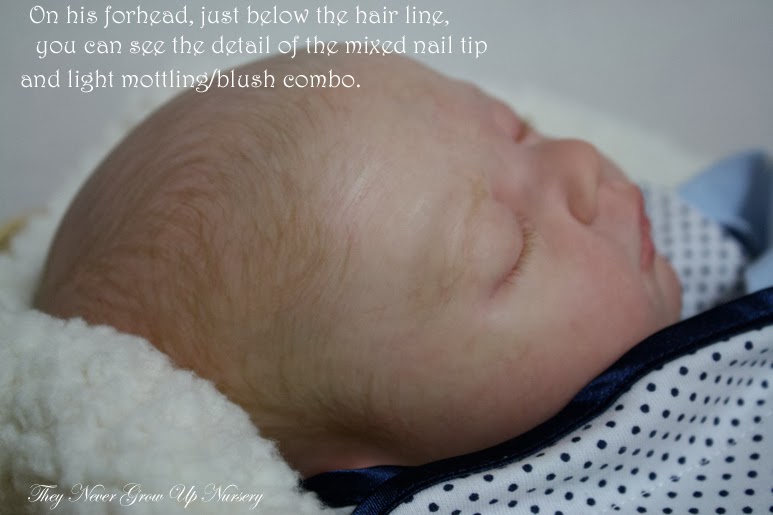
Here you can see just how spaced out the color is and how soft yet very vivid the visual texture is!
The same is true on the face as well.
Apply the paint in the same manner to the limbs, starting at the bottom of the foot/palm of the hand.
Wet paint on:
Wet paint pounced in/off:
Continue up each limb until you have reached the flange.
Once the limbs are complete, use the same color, the Pale Mottling/Blush
to color the ends of the toes and fingers.
(As you will see in another photo further down in the tutorial, I typically apply the Newborn Flush techinque to a limb then go back on that same limb and color the toes/fingers, then continue on with the next limb. You can do it either way~either way is perfect.)
First, use a damp brush to liberally apply the color to the bottom of the toes/fingers.
Just do 2 or 3 at a time.
Then quickly pounce with a dry wedge.
Finish it off with a dry mop brush to get between the toes/fingers.
Using a damp brush, add color to the tops of the toes/fingers.
As always, follow up with a dry wedge and dry mop brush.
I'd like a little more color on the ends of the toes and fingers.
With a damp brush, paint some color onto the edge of a wedge.
Apply that color to the toes and fingers and follow up with a dry wedge and dry mop brush.
Much better!
Here is the picture that shows that I complete the Newborn Flush technique then color the toes/fingers before I carry on to the next limb.
Once the Newborn Flush is done, we can blush the doll using the Dark Mottling/Blush
and a damp sponge.
Here is where you will not be applying the color to the full surface of the vinyl.
By that, I mean that this is even different than applying "sporadically".
In short, the blush is applied to the "high" spots on a kit, such as all of the fatty places.
In the next two pictures you can see where the blush was applied to the head and face.
Be sure to blush the backs of the ears, the ball of the nose and above the upper lip.
Blush the bottoms of the feet and palms of the hand heavier.
Some blushing on the leg.
On each side of this trail of blush, I would not blush until I got to the fat calf in the back and the fattest part of the front of the leg, and over the knee.
The fully blushed leg.
The blushing step has created lighter "channels" where the Blue Wash, Veins and Pale Pigment colors will go.
With that, it's time for the Blue Wash/undertones!
You can now clean the Dark Mottling/Blush from your palette.
The Blue Wash is applied with a damp mop brush and followed up with a dry wedge and a dry mop brush.
Begin at the back of the head, mostly in that channel that the blushing created.
Instead of "painting" this color on, blot it/pounce it on with the mop brush.
Follow up with a dry wedge and or dry mop brush.
Once the back and top of the head is complete, move around to the front of the face.
Apply in the area shown as well as above the eye brow bone, at the temples, in the ears~randomly, and over the eye lids.
Use a dry wedge and dry mop brush to pounce dry.
Set the head aside and apply the blue wash to each limb in the "channels"
that the blushing created.
With all limbs complete, you can now clean the palette of the Blue Wash and prepare
to create the veins.
Use a small, damp round brush for the vein work and work in small sections,
drawing on random veins, keeping them mostly withing the channels that were created from the blushing step and over the top of the Blue Wash, in most circumstances.
Quickly pounce with a dry wedge.
This picture didn't turn out very good but the next one is better.
The upper part of the veins are wet/not pounced while the lower
part of the veins near the temple are pounced.
Veins are random. Lighter in some areas, darker in others.
As far as I have seen, they are not the exact same on every person.
They are just in a general location.
There are a lot of pictures of babies on the internet where you can see vein patterns.
Completed veins:
When the head is complete, apply veins to each limb.
This is as far as I got on day 2.
Remember to clean off you palette and rinse out your brushes.
Look at how real Baby Joshua is looking!
Are you ready to add nail tips to your baby's nails?
This step makes many reborners so nervous but the blend of this paint was SO easy to use!
Stir well and place a little in the palette or dish.
Using a small round brush, paint a thin line along each nails end.
Allow the paint to set up ever so slightly.
Sculpt the nail tip with a wooden pick.
Easy-peasy!
Another area that makes new and established artists nervous are the brows!
The trick to brows is having the right consistency of paint and working in a horizontal direction from the bridge of the nose out toward the ear. Real eyebrows do not go up and down in a vertical fashion.
Start the brow just below the brow bone, extending to the horizontal center of the brow bone.
Look at real baby brows as you work.
I did a basic, just there brow as not to overwhelm the new artist,
using a long, thin, damp brush.
One last step before this baby grows some painted hair!
For this step, we will use the Pale Pigment Wash and a damp sponge.
This layer goes very quickly and is applied to the doll in any place that you want to add some visual texture, highlights or to tone down an area that is too bright with blush.
Usually this is applied to most of the "channels" that were created by the blush and to the fleshy part of the ears and over the ball of the nose.
I also add a little bit to the lips to create lighter areas and detail.
As always, follow up with a dry wedge and dry mop brush.
With that step complete, set your limbs aside to allow the nail tips to cure in preparation for glossing.
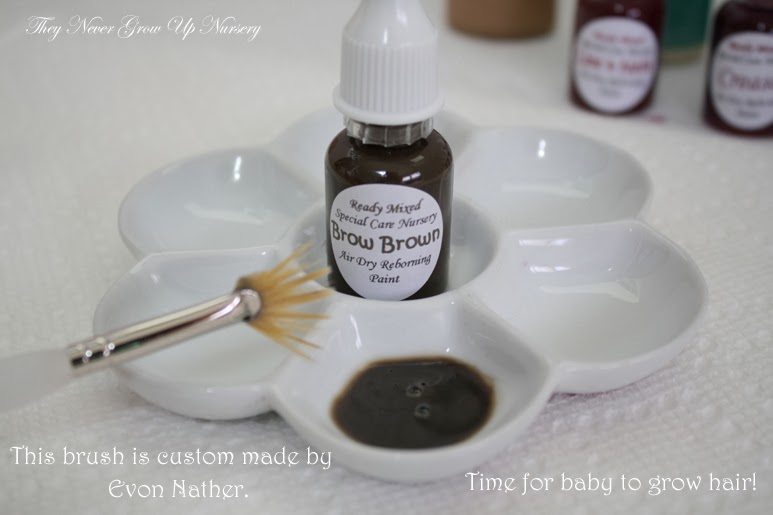
It's time for baby to get some basic painted hair.
The brow color is a very nice color for painted hair.
I am using one of Evon Nather's custom fan brushes.
These brushes are GREAT!
You can use it any which way to create different strokes of hair.
I am not going to show where the hair should be patterned as I do that on my YouTube video on the subject.
On this head, I just kept adding strokes creating lighter hairs and darker hairs until the head was covered with baby fine hair.
For painted hair, I usually do not go over all of the hair with a dry wedge, only in areas where I feel the hair is too thick or not what I wanted. The strokes will dry on their own with nice detail.
I like to add depth to my painted heads so I mix up a special color that I call
"Pinky-Flesh". To create this color, I placed a little bit of the Nail Tip color into the palette,
then added just a hint of the Pale Mottling/Blush color.
Making sure that the same customized fan brush is rinsed well,
I go over the head with the same brush and add the light color in very fine strokes.
I even like to go over the brows as well and along the forehead.
With the hair complete~and yes, even YOU can do basic painted hair!~
just look at a picture of a real baby while you work, now we can gloss the nails.
I prefer to use Satin Varnish on my nails but you can use the Gloss Varnish if you prefer.
Neither is right or wrong :)
Even with the gloss, use a damp brush.
Baby is now ready for rooted lashes and lip gloss.
I forgot to take pictures of glossing his lips and adding a little gloss detail to his eyes and nostrils,
sorry about that! I guess I got excited to get him done.
To create a softer finish and reduce the edge line of the gloss when working on the eyes and nostrils, use a dry wedge to refine.
For the lips, just brush the gloss on and refine the edges with a wedge if needed.
Welcome Joshua!
I am very excited about these paints for the beginning artist!
Of course they are great for the advanced artist as she can blend the colors and create her own style (especially when they come out with the pure pigments to go with the full line of mediums and thinners), but for the beginner, they are a wonderful addition to the painting world.
Just stir, pour and use!
Now, as an artist who has used 2 other brands of air dry paints since 2008, how do I think these paints compare?
These paints work just like any other acrylic air dry paint created for vinyl that I have used.
They have the same characteristics, behave the same and have the same pure colors that I love in acrylic paints.
As with the other acrylic paints I have used, they do tend to build up a sheen as layers are added to the limbs mostly~just like the other paints! On most heads, the paints I have used remain matte, just like these did.
Special Care Nursery is sending me a bottle of medium to try that makes a matte finish.
I will have to compare that to my special techinque if first coating a vinyl kit with
Genesis Matte or Satin Varnish before I paint, just like I have been doing since 2008 as I find this is the BEST method for eliminating shine when using air dry paints.
None of the air dry paints I use require this process. I just prefer it. :)
I hope you have enjoyed the tutorial and that any fears you have of painting your first doll or trying out acrylic air dry paints has been calmed.
I will not be stocking the paints for sale as I'd rather spend my time using them :)
Here is the link where you can purchase them:
I enjoyed bringing this baby to life and enjoyed writing this tutorial for you.
God bless and have fun painting!